


Compact dust collector splitter and blast gate
- Mar 25, 2018
- 4 min read
As soon as I got my new home CNC machine up and running, I started working on dust collection. Cutting anything on the mill makes an awful mess, so it was a top priority. I designed and cut a dust shoe based on some designs I found I YouTube. I was using a Ridgid ShopVac with the dust shoe, but the fine dust created by the CNC router was clogging up the filter far too often.
I have an Oneida Dust Deputy cyclonic separator connected to the shop vac in my garage, and I love the performance and the lack of filter cleaning. I wanted one for my CNC dust collection, but decided to try out a knock-off this time. I bought a clone from Banggood for $15.99 shipped. I got the separator setup on a 5 gallon bucket (with the vac hoses duct taped to it) and the results were just as good as the genuine Oneida.
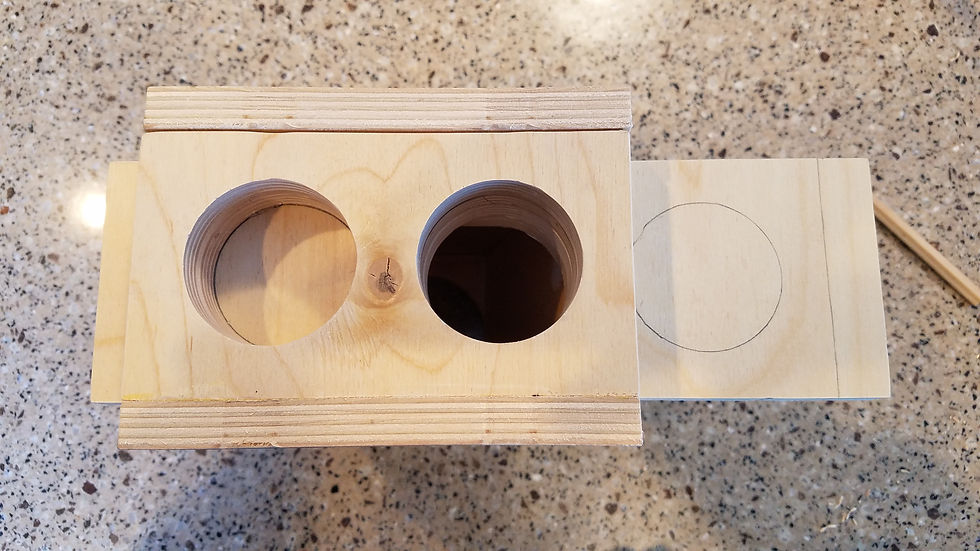
My dust shoe setup on my mill doesn't allow me to easily disconnect the vac hose from the router. I occasionally need a "free" vac hose to clean up messes I make when removing pieces from the stock, cleaning up fringe, or other dusty work. I don't want to have to remove the hose from the dust shoe each time, so I designed a combination vacuum line splitter and blast gate. Here's most of the kit right after I finished cutting it:
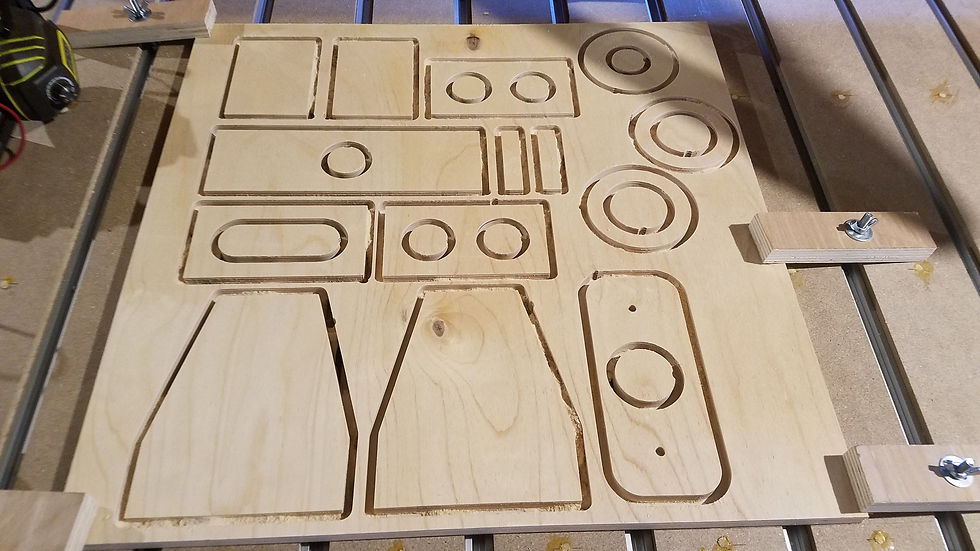
Next was some glue-up. The hose-connection end of the splitter is made up of two pieces glued together for double thickness. You can see them in the above picture - they're the rectangles with two circles cut out of the middle. They were glued and clamped together.


I also glued up the three rings that go on top of the cyclone to connect to the vacuum. Before gluing them together, I set the bottom ring on the piece that goes on top of the cyclone to drill pilot holes for attachment later.


Once the glue was setup, it was time for assembly of the main body. I'm using 3/4" 18 gauge nails to hold the pieces together while the glue sets instead of clamping. Parts all laid out and ready:

The face that connects to the cyclone goes on first:
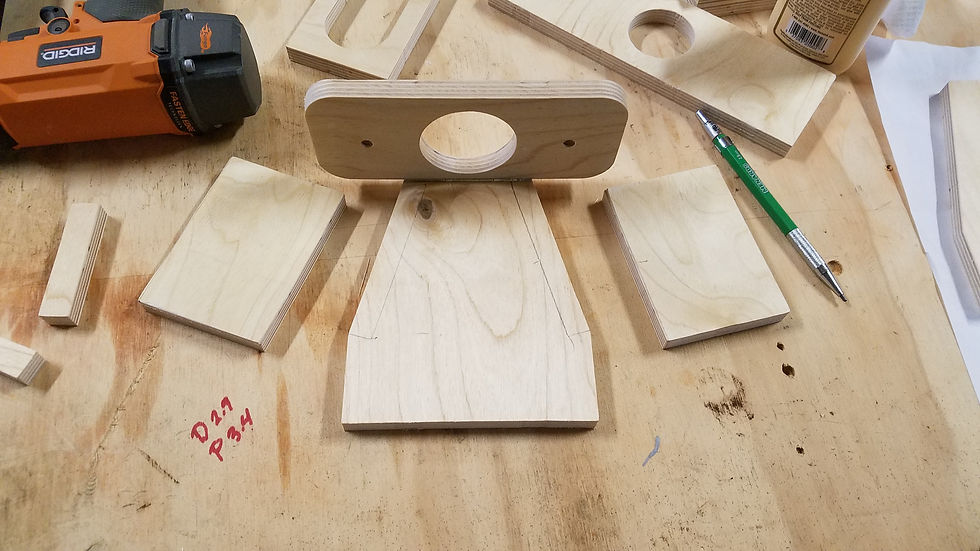
Followed by the two diagonals. *I designed and cut this project before I learned how to use the "model-draft" and "CAM - 3d ramp" tools in Fusion 360, so the angled joints aren't mitred. I am completely new to Fusion, so I was just happy to get this far along.

Next comes the plate that contains the sliding "gate"
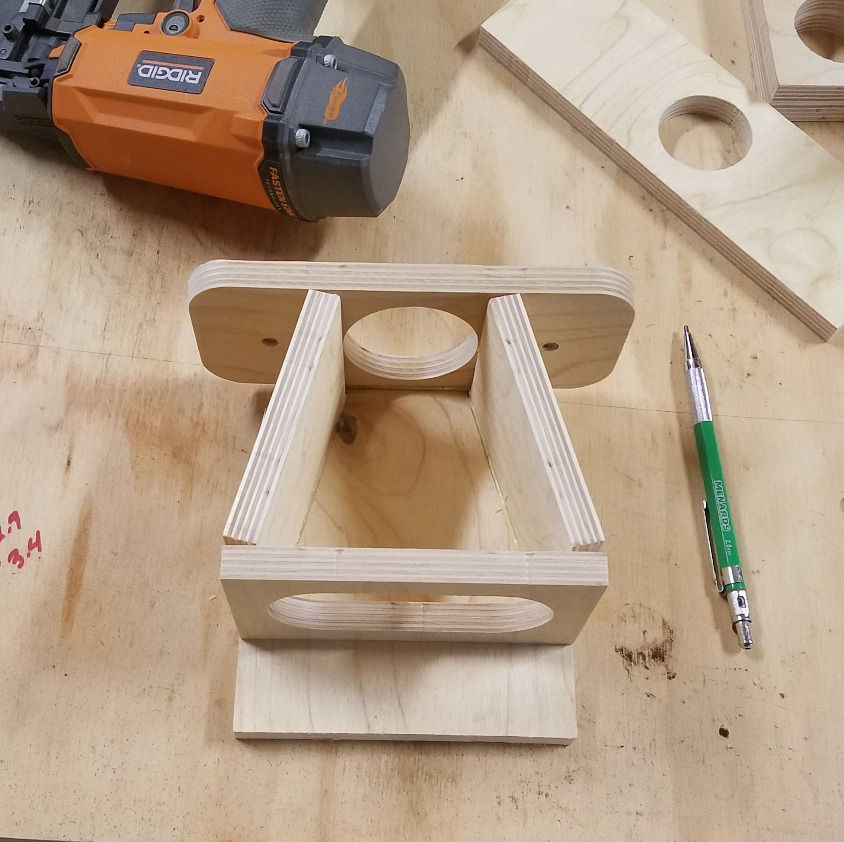
The sliding gate will get a coating of paste wax as a lubricant before final installation. To properly space out the parts, I folded a sheet of paper around the gate to act as a temporary spacer. With that in place, I could glue on the rear hose-connection plate and pin it in place.


After the glue dried on the bottom plate, I sealed up the interior joints with acrylic sealant.
The top pate on this housing will be held in place with screws instead of glue. I'm not sure if this system will ever get jammed up with dust or other material, but I want the option to open it and clean it out if the need arises.
Marked the sliding gate where I'll later attach the end-stops so that area didn't get covered with paste wax.
The ends were masked off and then I coated the remainder of the gate with wax so it will slide easily in the channel.

After the wax dried, I inserted the gate and attached both of the end stops with wood glue. The gate slides easily now thanks to the wax coating.

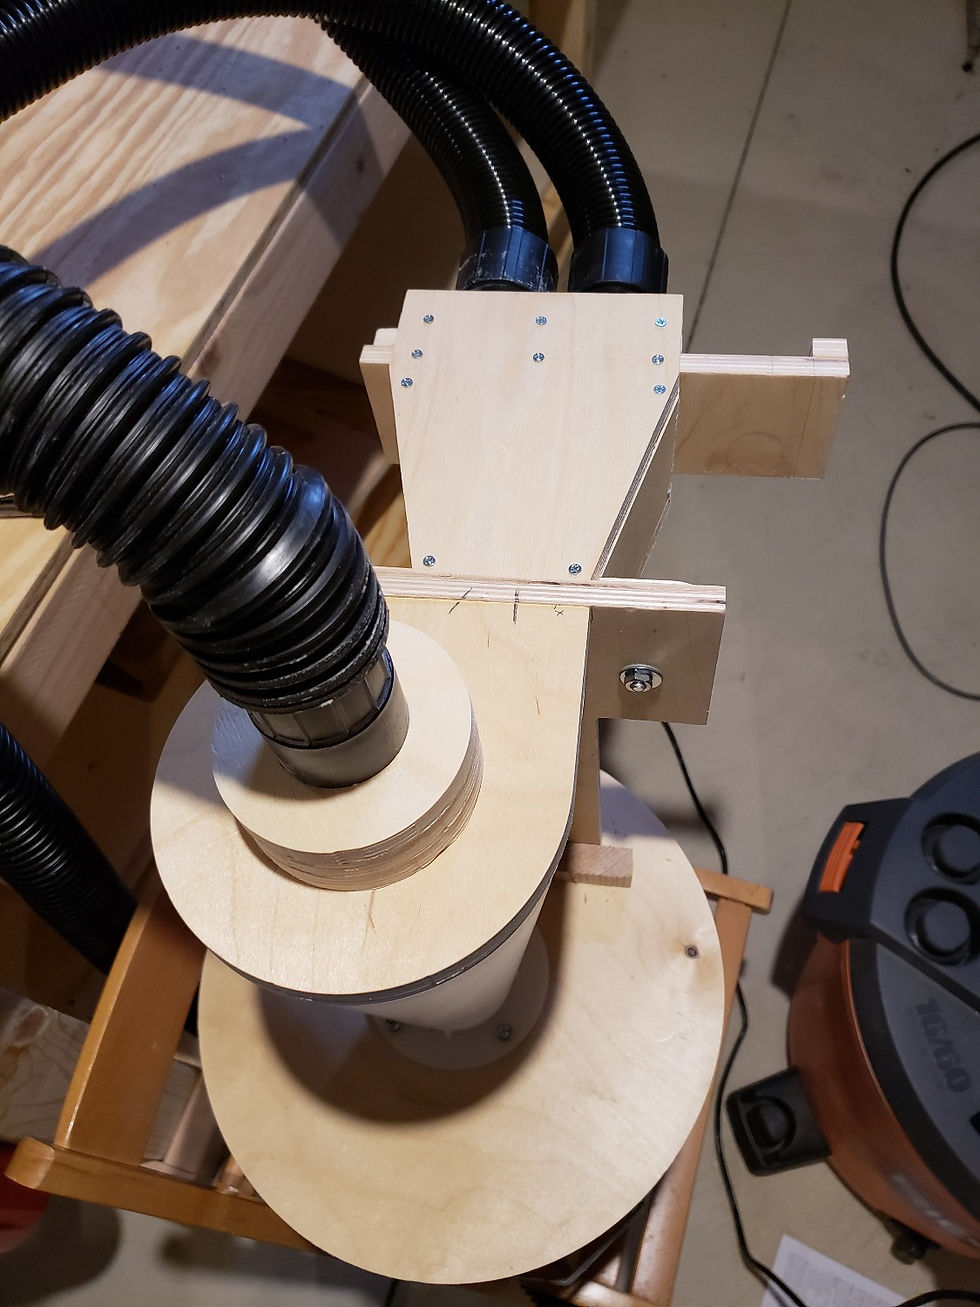
The last step was to assemble all of the components on and around the cyclone unit. The rings on the vacuum connector are a snug friction fit, but I added a small bead of caulk just to be sure it seals well.

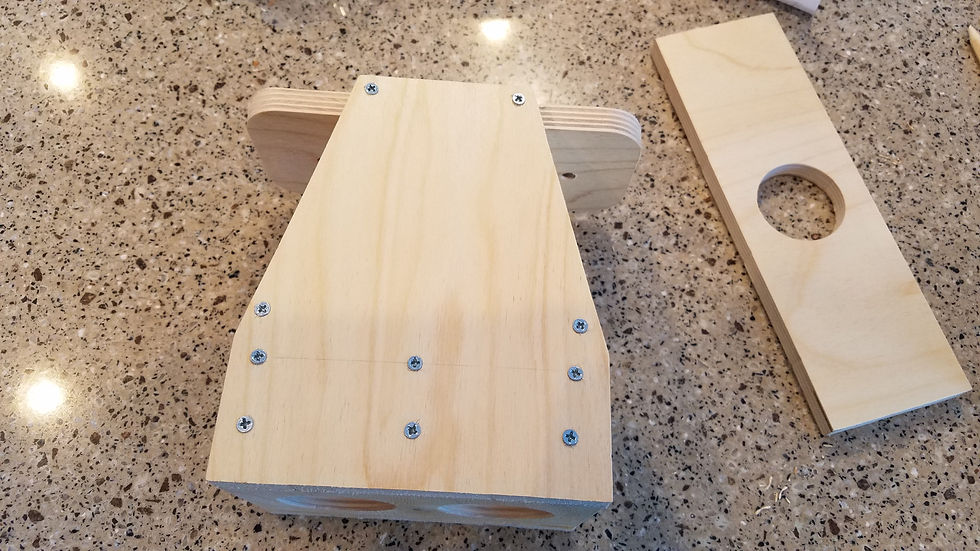
The vertical support piece is attached to the top plate and to a cleat on the bottom by some #4 x 1 inch screws.

Then, the splitter/gate is attached with 2 1/4-20 screws and nuts. The splitter is a very snug fit over the cyclone inlet tube. I didn't bother putting any sealant on that joint. It may leak a little, but not enough to be a problem for this application.

After the caulk had time to set up, I hooked up the hoses for a test. The hose from the shop vac goes in the top port to create the cyclone action. Then two hoses that I got from Menards are connected to the gate. One goes to the dust collection shoe on my CNC. The other is loose for table cleanup after a cut on the CNC. I just have to slide the blast gate in the box and I can choose which hose has suction.
This setup works great. Sometime soon, I will build a cabinet for the Ridgid vac to silence some of the noise it makes. When I do, this cyclone and splitter/gate system will sit on top of that case.
“We are a participant in the Amazon Services LLC Associates Program, an affiliate advertising program designed to provide a means for us to earn fees by linking to Amazon.com and affiliated sites.”
Comments